How to Properly Install, Operate, and Maintain Your Wafer Style Butterfly Valve
In the world of industrial applications, the Wafer Style Butterfly Valve holds great importance. These versatile, cost-effective, and reliable devices are used to regulate fluid flow in a wide range of systems. However, to ensure their longevity and optimal performance, proper installation, operation, and maintenance are crucial. This guide aims to provide you with comprehensive instructions on how to correctly install, operate, and maintain your Wafer Style Butterfly Valve. By following these guidelines, you can ensure your valve functions effectively and lasts for years to come. So, whether you’re new to the field or looking to brush up on your knowledge, this guide has got you covered.
Introduction
Wafer Style Butterfly Valves, with their compact design and efficient operation, are integral to a myriad of industrial applications, from water treatment plants to HVAC systems. Their primary function is to control the flow of fluids or gases within a system, but they can only perform this function efficiently when they are properly installed, operated, and maintained. Installation of these valves requires precision – they must be accurately positioned and securely fastened to ensure alignment with the pipe system. Safety precautions during this process are also paramount to prevent any accidents. Once installed, understanding the correct operation is essential. This involves knowing how to use the handle or actuator to control the valve’s opening and closing and recognizing the situations when the valve should be fully opened or closed. Incorrect operation can lead to damage or reduced efficiency. Maintenance, often overlooked, is equally important. Regular cleaning, inspection for wear and tear, and timely replacement of worn-out parts can significantly extend the valve’s lifespan. In some cases, professional maintenance services might be needed, especially if you notice any persistent issues. By adhering to these guidelines on installation, operation, and maintenance, you can ensure your Wafer Style Butterfly Valve performs optimally and stands the test of time.
Explanation of the importance and uses of Wafer Style Butterfly Valves.
Wafer Style Butterfly Valves are a critical component in many industrial applications due to their unique combination of durability, efficiency, and versatility. These valves are designed to control the flow of liquids or gases within a system, making them indispensable in sectors like water treatment, oil and gas, HVAC systems, and chemical processing. Their compact design allows them to fit in tight spaces, while their ability to handle a wide range of temperatures and pressures makes them suitable for various applications. The “wafer style” refers to the type of valve that is installed between two flanges using bolts or studs and nuts. This design is particularly beneficial as it allows for easy installation and removal, making maintenance and replacement tasks more straightforward. In essence, the importance and uses of Wafer Style Butterfly Valves cannot be overstated – they play a pivotal role in ensuring the smooth operation of numerous industrial processes.
Preview of what the blog post will cover.
This comprehensive blog post will delve into the world of Wafer Style Butterfly Valves, providing a clear understanding of their importance and various applications. It will guide you through the correct procedures for installing these valves, ensuring they are positioned accurately, fastened securely, and aligned correctly with your system’s piping. We will also discuss how to operate these valves safely and efficiently, including guidance on the use of the handle or actuator, as well as tips on when the valve should be fully opened or closed. In addition, we will explore the crucial aspect of maintenance – from regular cleaning and inspection to timely replacement of worn-out parts, all aimed at prolonging the valve’s lifespan. Finally, we will touch upon some common issues you might encounter and provide basic troubleshooting tips. Whether you are a novice in the field or an experienced professional looking to refresh your knowledge, this blog post will serve as a valuable resource in your journey to mastering the use of Wafer Style Butterfly Valves.
What is a Wafer Style Butterfly Valve?
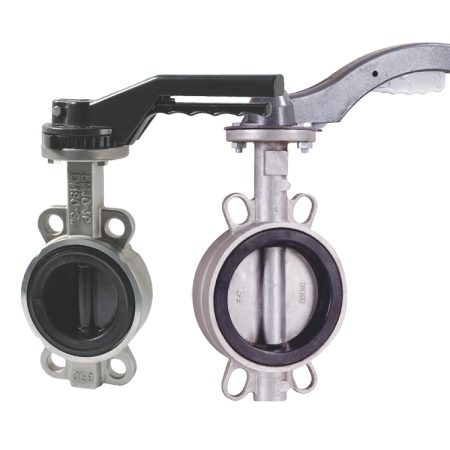
A Wafer Style Butterfly Valve is a type of flow control device widely utilized across various industries. It comprises a circular disc or plate with its pivot axes at right angles to the direction of flow in the pipe, which acts as a regulating mechanism. When the valve is closed, the disc is turned so that it completely blocks off the passageway. When the valve is fully open, the disc is rotated a quarter turn so that it allows an almost unrestricted passage of the fluid. The valve may also be opened incrementally to regulate flow. The term “wafer style” refers to the method of installation. This type of valve is installed between two flanges in a pipe using bolts or studs and nuts, resembling a wafer sandwiched between them. This design allows for a more straightforward installation and removal process, making maintenance tasks easier. The compact design of Wafer Style Butterfly Valves, along with their ability to handle varying degrees of temperature and pressure, makes them highly versatile. They are commonly used in a range of industries, including water treatment, oil and gas, HVAC systems, and chemical processing, where they play a critical role in controlling and regulating fluid flow.
Description and function of a Wafer Style Butterfly Valve.
A Wafer Style Butterfly Valve is a specialized type of valve used for controlling the flow of fluids in a piping system. It consists of a disc mounted on a rotating shaft. When the valve is fully opened, the disc rotates to a position parallel with the fluid flow, offering minimal resistance and allowing the fluid to pass through freely. Conversely, when the valve is closed, the disc rotates to a position perpendicular to the flow, effectively blocking the passage and stopping the flow of fluid. The term “wafer style” refers to the valve’s design and how it fits into the system. A wafer style butterfly valve is sandwiched between two flanges using long bolts or studs, resembling a wafer in a sandwich. This design allows for easy installation and removal, making it a practical choice for systems that require frequent maintenance. Due to their compact size, ease of operation, and cost-effectiveness, Wafer Style Butterfly Valves are widely used in various industries, including water treatment, chemical processing, and HVAC systems.
Discussion on the key components of the valve.
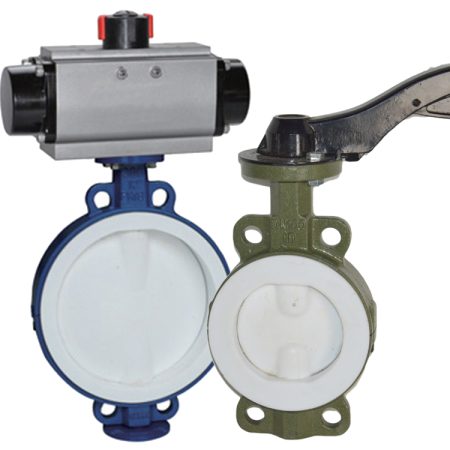
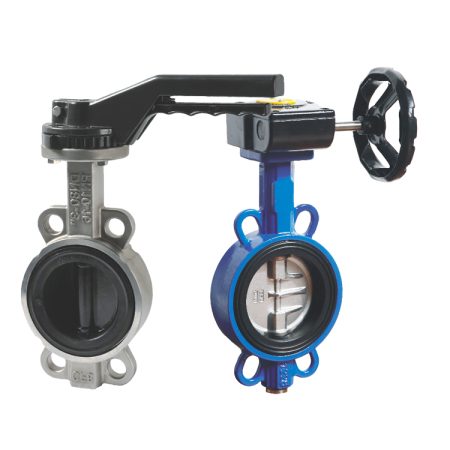
The key components of a valve, such as the Wafer Style Butterfly Valve, play crucial roles in its functionality and efficiency. The primary component is the disc, which acts as the gatekeeper for the flow of fluid or gas within the system. The position of the disc, controlled by the stem or shaft, determines whether the valve is open or closed. The stem, another critical component, is connected to an actuator or handle on the outside of the valve, allowing manual control over the disc’s position. The seat, usually made of resilient material, provides a sealing surface for the disc when the valve is closed. It ensures a tight seal to prevent leakage. The body of the valve, often made of durable materials like stainless steel or cast iron, houses these internal components and connects the valve to the piping system. Lastly, the flanges on either side of the wafer-style valve allow it to be sandwiched between two pipe sections and secured using bolts or studs. Each of these components plays a vital role in the operation of the valve, ensuring efficient flow control within the system.
Highlighting the industries and applications where these valves are predominantly used.
Wafer Style Butterfly Valves are predominantly used in a wide array of industries due to their versatility, durability, and cost-effectiveness. In the water treatment industry, these valves are essential for controlling and regulating the flow of water through treatment systems. They are also commonly found in oil and gas industries where they manage the flow of crude oil, natural gas, and other petroleum products in pipelines and processing facilities. HVAC systems often utilize these valves for regulating the flow of coolant or heating fluids. In the chemical processing industry, the resistance of these valves to a variety of chemicals makes them an integral part of processes involving corrosive or hazardous substances. Furthermore, they are frequently used in food and beverage industries as they meet sanitary standards for controlling the flow of liquid food products. The compact design and easy maintenance of Wafer Style Butterfly Valves make them an excellent choice for these and many other applications. Their ability to efficiently control and regulate fluid flow ensures smooth operation in various industrial processes.
How to Install a Wafer Style Butterfly Valve
The installation of a Wafer Style Butterfly Valve involves several steps to ensure it functions correctly and efficiently. Before beginning the installation process, it’s crucial to check that the valve is suitable for the intended application in terms of size, material, and pressure rating. Once confirmed, start by preparing the pipeline where the valve will be installed. The pipe ends should be aligned properly, and the pipeline should be clear of any debris or obstructions. It’s also important to ensure that the flanges on the pipeline match the valve’s specifications.
To install the valve, first, fully open it by turning the handle or actuator to ensure that the disc does not get damaged during installation. Next, insert the valve between the flanges of the pipeline. The valve’s mounting holes should align with the pipeline flanges’ holes. Then, insert the bolts or studs through the aligned holes, ensuring that they pass through both pipeline flanges and the valve. Secure the assembly using nuts but do not fully tighten them yet.
At this point, you should check the alignment of the valve and pipeline. The disc should be centered within the pipeline, and the valve body should be parallel with the pipeline flanges. Once the alignment is confirmed, you can proceed to tighten the nuts evenly across the flange to secure the valve properly. Avoid over-tightening as it may cause damage to the valve or pipeline.
Finally, operate the valve a few times to ensure it opens and closes smoothly. Check for any leaks around the flanges and make necessary adjustments if required. After these steps, the Wafer Style Butterfly Valve should be successfully installed and ready for operation. It’s recommended to carry out periodic checks and maintenance to ensure the valve continues to function optimally.
List of necessary tools for installation.
For the installation of a Wafer Style Butterfly Valve, you will need several tools to ensure a smooth and correct setup. First, a set of wrenches or a socket set is essential for tightening and loosening bolts or nuts. This includes both standard and metric sizes to fit the specifications of your valve. A torque wrench may also be necessary to ensure the bolts are tightened to the correct specifications. A pipe cleaner or brush is needed to clean the pipeline before installation, removing any debris or residue that could affect the valve’s performance. You’ll also need a level to confirm the alignment of the valve within the pipeline. If the valve comes with a gasket, a gasket scraper may be useful to remove any old gasket material from the flanges. Safety equipment such as gloves and safety glasses should also be on hand to protect against potential hazards during installation. Lastly, having a user manual or installation guide specific to your valve model can provide valuable step-by-step instructions and specific tool requirements.
Step-by-step guide to correctly install the valve.
To correctly install a Wafer Style electric butterfly valve, follow these step-by-step instructions:
Preparation: Ensure that the pipeline where the valve will be installed is clean and free from any obstructions. Use a pipe cleaner or brush for this purpose. Also, check the valve itself to ensure it’s in good condition and suitable for the intended application.
Positioning the Valve: Open the valve fully by turning the handle or actuator. This ensures the disc doesn’t get damaged during installation. Position the valve between the pipeline flanges, aligning the mounting holes of the valve with those of the pipeline flanges.
Securing the Valve: Insert the bolts or studs through the aligned holes of the valve and pipeline flanges. Secure them loosely with nuts but don’t fully tighten yet.
Alignment Check: Check the alignment of the valve with the pipeline. The disc should be centered within the pipeline, and the valve body should be parallel to the pipeline flanges. If the alignment is off, adjust the position of the valve accordingly.
Tightening the Bolts: Once the alignment is correct, evenly tighten the nuts across the flange using a wrench or socket set. Be cautious not to over-tighten as this could damage the valve or pipeline.
Operation Check: Operate the valve a few times to ensure it opens and closes smoothly. Check for any leaks around the flanges. If any leaks are found, you may need to adjust the tightness of the nuts or check the valve’s seal.
Final Step: Once the valve is operating correctly with no leaks, the installation is complete. Remember to conduct regular maintenance checks to ensure ongoing optimal performance of the valve.
Note: Always refer to the manufacturer’s manual for specific instructions related to your particular valve model.
Safety precautions to be observed during installation.
The installation of a Wafer Style Butterfly Valve, like any other mechanical task, requires certain safety precautions to be observed. First and foremost, always wear appropriate personal protective equipment (PPE). This can include safety glasses to protect your eyes from debris, gloves to protect your hands from sharp edges or hot surfaces, and steel-toe boots in case of dropped tools or components. It’s also important to ensure that the pipeline is fully depressurized and drained before beginning the installation process. Accidental release of pressurized fluid can cause serious injury. Always use the correct tools for the job and ensure they are in good condition. Tools in poor condition can slip or break, leading to potential accidents. Handle the valve carefully during installation to avoid damaging the disc or seat. If the valve is heavy, use appropriate lifting equipment to avoid strain or injury. Lastly, always follow the manufacturer’s instructions and guidelines for the specific valve model you’re installing. These instructions are designed not only to ensure correct installation but also to promote safety during the process.
Operating Your Wafer Style Butterfly Valve
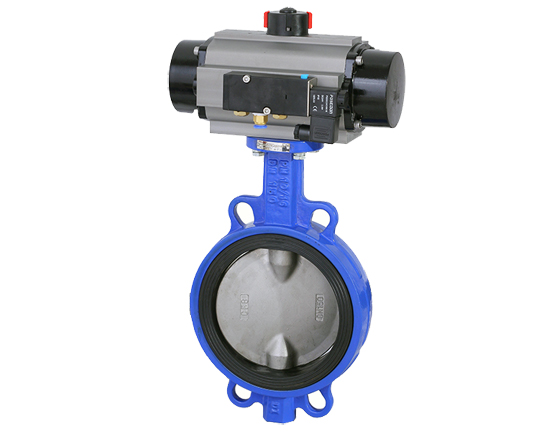
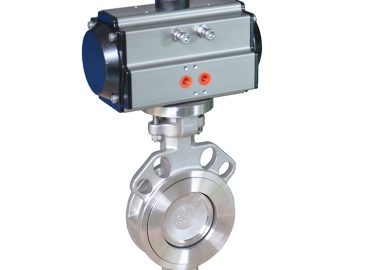
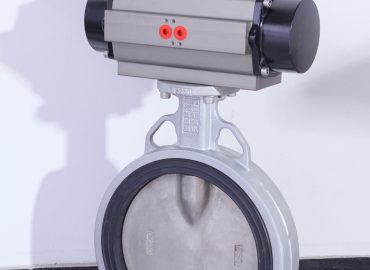
Operating a Wafer Style pneumatic butterfly valve involves a few simple steps, but understanding the mechanics behind it is crucial to ensure its longevity and maintain efficiency. A butterfly valve operates through a disc that’s mounted on a rotating shaft. When the handle or actuator is turned, the disc rotates, allowing or blocking the flow of fluid through the pipeline. In the fully open position, the disc is rotated parallel to the fluid flow, offering minimal obstruction and maximum flow rate. Conversely, in the fully closed position, the disc is rotated perpendicular to the flow, blocking it entirely.
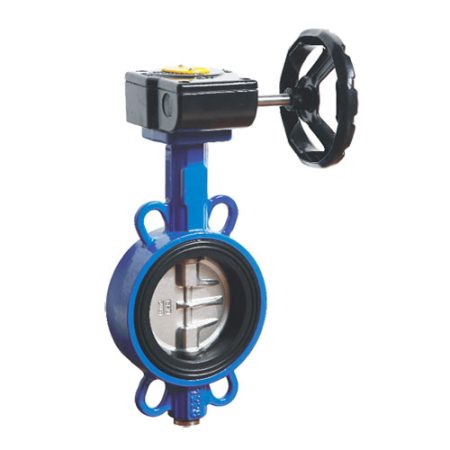
To operate the valve, turn the handle or actuator. In manual valves, this usually involves turning a handwheel or lever attached to the stem. The number of turns or degree of rotation required will depend on the design of the valve. Some valves have a quarter-turn operation, meaning a 90-degree turn of the handle will fully open or close the valve, while others may require multiple turns.
It’s essential to avoid forcing the handle if it becomes difficult to turn. Instead, check for any obstructions or debris in the valve that may be hindering its operation. Regular maintenance, including lubrication of the stem and checking the integrity of the seal, can help ensure smooth operation.
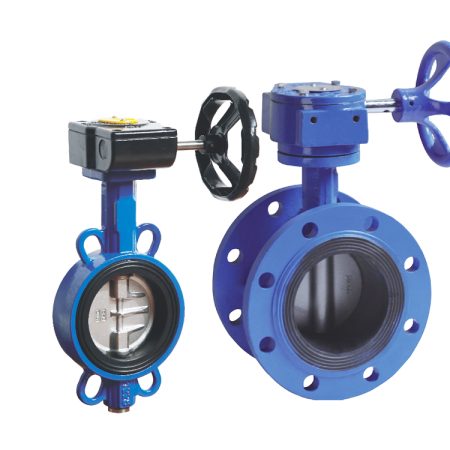
In the case of automated butterfly valves, the actuator will control the rotation of the disc. These actuators can be electric, pneumatic, or hydraulic, depending on the application. The operation of these valves can often be controlled remotely, and some even have feedback mechanisms to provide information about the valve’s position.
Remember, incorrect operation of a butterfly valve can cause damage to the disc, the seat, or other valve components, leading to leaks or valve failure. Therefore, it’s crucial to understand the correct operation of your specific valve model, typically provided in the manufacturer’s operating manual.
Procedures and guidelines for safely operating the valve.
Operating the Top Guided Single Seat Control Valve safely and effectively requires adherence to specific procedures and guidelines. Firstly, it’s crucial to familiarize yourself with the valve’s operation by referring to the manufacturer’s instructions. The manual will provide detailed steps on how to correctly open, close, and adjust the valve, preventing potential damage or malfunction.
Before operating, always check that the system’s pressure and temperature are within the valve’s specified limits. Exceeding these parameters can lead to valve failure and pose safety risks. Additionally, ensure the media flowing through the valve is compatible with its material to prevent corrosion or degradation.
When manually operating the valve, turn the handle or actuator smoothly and steadily. Rapid adjustments can cause pressure surges or ‘water hammer’ effects, which may damage the valve or pipeline. If you encounter resistance while turning the handle, don’t force it. Instead, investigate the issue—it could be a blockage or a problem with the actuator.
Periodic maintenance is a significant part of safe valve operation. Regular inspections for leaks, seal integrity checks, and valve stem lubrication should be part of your routine. Any issues identified during these inspections should be addressed promptly to prevent escalation.
In the case of automated valves, verify that the actuator and control systems are functioning correctly. Always follow safety protocols when dealing with automated systems, including isolating the valve from its power source before performing maintenance tasks.
Lastly, adhere to general safety practices when operating valves, such as wearing appropriate personal protective equipment (PPE) and following lockout/tagout procedures when necessary. By observing these procedures and guidelines, you’ll ensure the safe and efficient operation of your Top Guided Single Seat Control Valve.
Explanation about the role of the handle or actuator in operation.
The handle or actuator plays a pivotal role in the operation of a Top Guided Single Seat Control Valve. Essentially, it’s the interface that allows you to control the position of the valve’s internal components, thus regulating the flow of fluid through the pipeline. In manual valves, the handle is connected to the valve stem. As you turn the handle, it rotates the stem, which in turn moves the valve disc or plug. This movement can either open or close the pathway for fluid, allowing you to control the rate of flow.
In the case of automated valves, the handle is replaced by an actuator. The actuator, which can be electric, pneumatic, or hydraulic, receives signals from a control system and uses energy to move the valve components. Just like with a manual handle, the actuator can open, close, or partially open the valve to regulate flow. The actuator allows for more precise control, especially in complex systems, and can often be operated remotely for increased safety and convenience. Whether manual or automated, the handle or actuator is a critical component in the operation of your valve.
Guidance on when to fully open or close the valve.
Knowing when to fully open or close the Top Guided Single Seat Control Valve is crucial for its efficient operation and the overall performance of your system. As a general rule, the valve should be fully opened when you want to achieve maximum flow rate through the pipeline. This might be necessary when your system requires full capacity operation, such as during peak usage times or when trying to quickly fill or empty a tank.
On the other hand, the valve should be fully closed when you need to stop the flow completely. This could be during maintenance activities, in response to a safety issue, or when the system is not in use. Remember, a partially closed valve can still allow some flow, so if complete shutoff is required, ensure the valve is fully closed.
In some cases, you may need to partially open or close the valve to achieve a desired flow rate, this is often referred to as throttling. While the Top Guided Single Seat Control Valve is designed for precise control, frequent throttling can lead to wear and tear on the valve seat and disc, potentially reducing the valve’s lifespan. Therefore, it’s important to monitor the valve’s condition regularly and perform necessary maintenance to ensure its longevity. Always refer to the manufacturer’s guidelines or consult with a valve specialist if you’re unsure about the correct position for your valve in a particular situation.
Tips to prevent potential damage during operation.
Preventing potential damage during the operation of a Top Guided Single Seat Control Valve involves following certain best practices. Firstly, always ensure that the operating conditions, including pressure, temperature, and type of fluid, are within the valve’s specified limits. Exceeding these limits can cause undue stress on the valve, leading to premature failure.
When manually operating the valve, turn the handle or actuator smoothly and gradually. A sudden change in position can lead to pressure surges or water hammer effects, which could damage the valve or the pipeline. If you encounter resistance when turning the handle, do not force it. This could indicate an obstruction or issue with the valve’s internal components. Instead, investigate the source of the resistance to prevent further damage.
Regular maintenance is also key to preventing damage. This should include periodic inspection for leaks, checking the integrity of the seal, and lubricating the stem. If any issues are detected during these checks, they should be addressed immediately to prevent them from escalating.
For automated valves, ensure that the actuator and control systems are properly calibrated and functioning correctly. A malfunctioning actuator could cause improper operation of the valve, leading to potential damage.
Lastly, always follow the manufacturer’s guidelines and general safety practices when operating valves. This includes wearing the appropriate personal protective equipment and adhering to lockout/tagout procedures when necessary. By following these tips, you can help prevent potential damage during the operation of your valve.
Maintaining Your Wafer Style Butterfly Valve
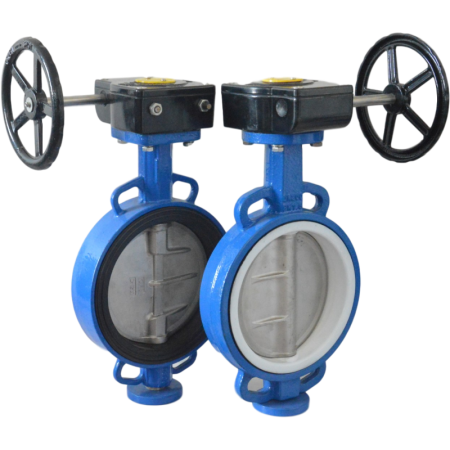
Maintaining your Wafer type Butterfly Valve is essential to ensure its longevity and efficient operation. This type of control valve is known for its durability and low maintenance requirements, but that doesn’t mean it should be neglected. Regular maintenance starts with periodic inspections. Look for any signs of wear or damage on the valve disc, stem, and seal. Check for leaks around the stem or between the valve and the flanges. If you notice any issues, they should be addressed promptly to prevent further problems.
Cleaning is another crucial part of maintenance. Depending on the media flowing through the valve, deposits may build up over time, affecting the valve’s performance. Therefore, regular cleaning should be carried out using suitable cleaning agents that won’t harm the valve’s materials. However, avoid abrasive cleaning methods that could damage the disc or seat.
Lubrication is also necessary, especially for the stem, to ensure smooth operation. Use a lubricant compatible with the valve’s material and the system’s operating conditions. Re-lubricate the valve as per the manufacturer’s recommendations or whenever you notice increased resistance during operation.
The wafer style butterfly valve’s sealing elements are critical for its proper functioning. Over time, these seals can degrade, leading to leaks. Therefore, they should be inspected regularly, and if any wear or damage is noted, the seals should be replaced.
For automated valves, the actuator requires special attention. Ensure it receives the correct power supply and that its controls are properly calibrated. Any issues with the actuator can affect the valve’s operation, so regular checks are vital.
Finally, always refer to the manufacturer’s maintenance guidelines. These instructions will provide specific advice tailored to your valve model. By following these steps, you can keep your Wafer Style Butterfly Valve in top condition, ensuring reliable and efficient operation for many years.
Importance of consistent and proper maintenance.
The importance of consistent and proper maintenance for a Top Guided Single Seat Control Valve, or any mechanical system, cannot be overstated. Regular maintenance ensures that the valve functions optimally, providing reliable control over the flow of fluids in your system. Consistent checks allow for early detection of potential issues such as leaks, wear, or damage, which can be rectified before they escalate into major problems or system failures. Proper maintenance also extends the lifespan of the valve, saving costs associated with premature replacement. Moreover, it ensures safety by preventing malfunction-related accidents. For automated valves, maintenance of the actuator and control systems is crucial for accurate and responsive operation. Neglecting maintenance can lead to inefficient performance, increased energy consumption, and eventual system breakdown. Therefore, adhering to a regular maintenance schedule and following the correct procedures is vital for the sustained efficiency and longevity of your valve.
Step-by-step guide for regular maintenance checks.
Regular maintenance checks for your Top Guided Single Seat Control Valve should follow a systematic approach to ensure thoroughness and consistency. Here’s a step-by-step guide:
Visual Inspection: Start with a general visual inspection of the valve and its surrounding area. Look for any signs of leaks, corrosion, or physical damage.
Operational Test: Next, operate the valve to ensure smooth functioning. If it’s manual, turn the handle to open and close the valve. For an automated valve, use the control system to operate the actuator. The valve should open and close smoothly without excessive force or resistance.
Check for Leaks: While the valve is in operation, check for leaks. Pay particular attention to the seal areas and the stem. If you notice any leaks, it could indicate a failing seal that needs to be replaced.
Inspect the Actuator: For automated valves, inspect the actuator and its connections. Ensure that the power supply is stable and the control signals are accurate. Any anomalies could affect the valve’s operation and should be addressed promptly.
Lubricate the Valve Stem: Apply suitable lubricant to the valve stem to ensure smooth operation. This step is particularly important for manual valves but can also apply to automated ones depending on their design.
Check Operating Conditions: Finally, verify that the operating conditions, including pressure, temperature, and fluid type, are within the valve’s specified limits. Operating outside these parameters can lead to valve failure.
Remember, this guide is a general overview. Always refer to the manufacturer’s instructions for specific maintenance procedures for your particular valve model. Regular maintenance checks will help prolong the life of your valve, improve its performance, and prevent potential issues from becoming major problems.
Advice on when professional maintenance services might be needed.
While regular self-maintenance and inspections are crucial for the longevity of your Top Guided Single Seat Control Valve, there are times when professional maintenance services might be needed. If during your regular checks you notice persistent leaks, significant wear or damage, or any abnormalities in the valve’s operation that you cannot rectify, it’s advisable to seek professional help. Similarly, if the valve requires a part replacement and you’re not confident in performing this task yourself, a professional service can ensure it’s done correctly. Additionally, for automated valves with complex control systems, professionals may be better equipped to handle calibration and troubleshooting tasks. Professional maintenance services are also recommended for periodic thorough inspections and servicing, even if no obvious issues are present. They have the expertise to detect and address potential problems before they escalate. Lastly, if your system operates under particularly harsh or critical conditions, regular professional maintenance can provide added assurance of the valve’s reliability and safety.
Suggestions on how to prolong the lifespan of the valve.
Prolonging the lifespan of your Top Guided Single Seat Control Valve involves a combination of proper use, regular maintenance, and timely repairs. First and foremost, always operate the valve within its specified parameters, including pressure, temperature, and type of fluid. Exceeding these limits can cause undue stress on the valve and significantly shorten its lifespan.
Regular inspections and maintenance are also crucial. This includes checking for leaks, inspecting the seal and other components for wear or damage, lubricating the stem, and cleaning the valve to prevent buildup of deposits. Address any issues promptly to prevent them from escalating.
For automated valves, maintaining the actuator and control systems is equally important. Ensure they receive the correct power supply, the controls are properly calibrated, and the actuator is functioning correctly.
Avoid frequent throttling of the valve as it can lead to wear and tear on the valve seat and disc. If partial flow is required, consider using a valve specifically designed for flow control.
Finally, use only manufacturer-approved parts for any replacements. Using incompatible parts can lead to sub-optimal performance and potential damage. By following these suggestions, you can help ensure your valve operates efficiently and reliably for many years.
Conclusion
In conclusion, the proper installation, operation, and maintenance of your Wafer Style Butterfly Valve can significantly enhance its efficiency, prolong its lifespan, and ensure its reliable performance over time. Begin with an accurate installation process, adhering to the manufacturer’s guidelines, and considering factors such as the orientation of the disc, alignment with the pipeline, and correct placement of gaskets to prevent any leaks or malfunctions.
When it comes to operation, always respect the specified parameters of pressure, temperature, and type of fluid. Avoid abrupt changes in position, especially during manual operation, as this could lead to pressure surges or water hammer effects, which could damage the valve or the pipeline.
Maintenance plays a pivotal role in preserving the valve’s functionality and longevity. Regular visual inspections, operational tests, leak checks, lubrication, and cleaning are essential components of a comprehensive maintenance routine. For automated valves, additional attention should be given to the actuator and control systems to ensure their proper functioning.
There may come a time when professional maintenance services are required, such as when you encounter persistent issues, need part replacements, or require a thorough inspection. Don’t hesitate to seek professional assistance to ensure the valve’s optimal performance.
Finally, extending the valve’s lifespan involves a combination of correct usage, regular maintenance, and prompt repairs. Remember to avoid frequent throttling of the valve, use only manufacturer-approved parts for replacements, and always operate within the valve’s specified conditions.
By following these steps, not only will you enhance your valve’s performance and durability, but you’ll also contribute to the overall efficiency and reliability of your fluid control system. Your Wafer Style Butterfly Valve is a significant investment, and with proper care, it can serve your system effectively for many years.
Recap of the main points covered in the post.
In this post, we’ve covered essential aspects of installing, operating, and maintaining your Wafer Style Butterfly Valve. We began with the importance of proper installation, which sets the foundation for efficient operation, and discussed the need to adhere to specified parameters during operation to prevent damage to the valve or pipeline. We delved into the necessity of regular maintenance, including visual inspections, operational tests, leak checks, lubrication, and cleaning. For automated valves, we emphasized the importance of maintaining the actuator and control systems. We also highlighted scenarios that might necessitate professional maintenance services. Lastly, we provided suggestions on prolonging the valve’s lifespan through correct usage, regular maintenance, and timely repairs. By adhering to these guidelines, you can enhance the performance and longevity of your Wafer Style Butterfly Valve, contributing to the overall efficiency of your fluid control system.
Encouraging proper installation, operation, and maintenance of Wafer Style Butterfly Valves for optimal performance and longevity.
Proper installation, operation, and maintenance of your Wafer Style Butterfly Valve are key factors that significantly influence its performance and longevity. We strongly encourage users to adhere to the manufacturer’s guidelines during installation, ensuring correct orientation and alignment with the pipeline. During operation, respect the specified parameters such as pressure, temperature, and the type of fluid to prevent premature wear or damage. Regular maintenance, including visual inspections, operational tests, leak checks, lubrication and cleaning, cannot be overlooked. For automated valves, pay extra attention to maintaining the actuator and control systems. In situations where you encounter persistent issues or need part replacements, don’t hesitate to seek professional maintenance services. Remember, your valve is a critical component of your fluid control system. By investing time and effort in its proper care, you can ensure optimal performance, prolong its lifespan, and contribute to the overall efficiency and reliability of your system.